Friday, February 27, 2015

Low Volume Plus Block

Have you heard about the Low Volume Plus Block Swap?  Did you sign up for it?  The word is out!   Check on instagram (#lowvolumeplusswap) and on Craftbuds for a massive swap! All the information you need is available here:  Swap With Us!  Tutorial, ideas, inspiration!

This block is super easy, fun and gorgeous of course!  You just need to sign up and choose the quantity of blocks you want to make.  In return, you get the same amount of blocks back for your very own quilt!  There is plenty of time to participate.  The deadline isn't until May...what are you waiting for?!

I decided to jump in!  I've never done a swap of any kind and wanted to give it a try.  I decided to take on 24 blocks. 


I pulled out my low volume fabrics and began to cut.  It was easier for me to cut everything before I started piecing.  Let the assembly line begin!


Picking the right fabrics was interesting!  They needed to be bright and one color.  And I almost did it right!


The assembly line.  Sew, snip, iron and repeat!


Its a good thing I finally caved and bought some bundles of low volume fabrics!  I kind of love them!


I really enjoyed making this block!  Addicting is the word that comes to mind!  Because I hate to put off projects, I decided to knock out all 24 blocks in one day!  You just never know what may come up.  I was being responsible!  And as it turns out I will need to make a few more replacements!  


Turns out there are a couple that I need to redo.  The 'plus' doesn't stand out enough.  I'm ahead of the game, so I can make some changes in plenty of time to meet the deadline!

On another completely different topic!  While I was piecing some feathers yesterday, I kinda broke a rule!  


Something that has never happened to me before!  I set my ruler on the cushioned chair and before I knew it I knelt on the ruler and heard a lovely 'snap!!  Clean break.  Shock. And then I had to laugh!  (oh what?  is that woven stripes...again?!)  


I use it all the time and of course don't have another, I had to think quick!  For the time being I used some clear packing tape for a temporary fix to remedy the accident!  And, hey there sharpie marker...you sutured the crack with precision!  

Have you ever broken or messed up one of your favorite go-to tools?  My ruler will need to be replaced very soon!  


LINKING:
  

Monday, February 23, 2015

Another Pre-Cut Solution

I cannot say exactly how long I have had this Moda Honeycomb stack. They quietly take up a tiny little piece of space in the closet.  Not really in the way and certainly not hurting a thing.  I would pull it out and look at it, admire the colors and wonder what it will one day become.  

While I'm working my way through a creative block, I thought I just need to do...sew, make something!  I'm running around like a crazy lady!  My daughter keeps saying "Mom, you need to make something"...

I didn't want to put too much thought into whatever it is I was going to make.  Mostly it was a way to stay productive.  Stay out of trouble!  Even to stay warm!


These are what I had to work with.  Looking for an easy fix (and I do mean easy) I began the search.  From this stack of hexies... 

28" x 33"
...to this little quilt!  I used a variety of low volume, neutral solids between the rows (my new friends).  From white to putty!  Does it look difficult?  It was a breeze!  When I see hexies I imagine they must be hard to work with.

I found this great idea and tutorial by Amanda on her blog A Crafty Fox. Most of you know her as the owner of Westwood Acres, the fabulous and wonderful fabric shop!  A fun fact about that little honeycomb stack:  I won them in a giveaway that Amanda was running...crazy!


For this size quilt, I had to cut 4 of the 40 hexies in half because the rows are staggered and you need them on the top and bottom.  That left me with 36 left and I only needed 33 for this quilt.  I was also able to use up some neutral scraps too!


The tutorial requires four - 4 1/2" x 2 1/4" strips for each block.  


After sewing each strip and pressing the seams, you trim each side.


And the top and bottom.  Make sure to allow for 1/4" seam from the points!


They end up looking just like this.  Making the hexagon's into squares is so much easier for me!


Sew your rows together alternating each row with a half hexie row.  I tried to be careful to match the seams in the rows.  I didn't want the zig-zags to get funky!


Since this is a pretty small quilt, I added a Kona Cayenne Red border.  It turned out to be a perfect match with the Moda orange/red.  


I got it pinned and started quilting.  Simple 1/4" zig-zag lines between the rows and 1/4" on either side of the hexie rows.  To finish it off, I used my Hera Marker and created a diamond vertically through each from of color.  


 I really like the subtle changes of the neutrals in the zig-zag!


I decided to name this quilting my 'HexArgyle' design!  The back is the same as the border from the front.  Cayenne.  I went with Kona Yarrow (which is also a great match to the Moda) for the binding.  


I kinda dig this little mini, baby, hexie, zig-zag quilt!


I hope you get a chance to try this easy and brilliant tutorial!  I enjoyed making it and maybe one day will try it again!
  
LINKING:

Giveaway Winners !

Thank you for entering the giveaway!  And a big congratulations to the three lucky winners!

Rochelle ~ Debbie ~ Michele

Lindsay will be in touch with you very soon!  

If you would like to purchase the 'Glass Half Full' PDF pattern, it's available on Etsy: HERE!  
Lindsay Sews

Right now Lindsay is offering 25% off this PDF pattern!!

Use coupon code:  NEWSLETTER25 (expires 2/28/15)

Thank you Lindsay!!

And for some added fun...Lindsay has put together a Low Volume Plus Swap!  

Check it out the details here:  Craft Buds


I'm going to sign up now!!

Sunday, February 22, 2015

Struggling For Ideas

Have you ever had a creative block?  Wanted to make something but the ideas are just not coming through?  

The past couple weeks have been a standstill on creativity.  It feels a little like being suspended in space.  Floating around in a virtual state of limbo. After a while you begin to wonder if it will ever return!     

I know there will be an eventual break through.  The creativity will flow once again.  It may take time, but it will show up.  

Creativity seems to come and go, you find it in the most unlikely places and it isn't something you can force.  Right before falling asleep, a photo, a long forgotten sketch.  Looking for inspiration is the easy part, right? Type a word, search and viola!  A world of inspiration at your finger tips!  

Since I know I'm not the only one that this has happened to, here are some great ideas to help get back on track!

Overcoming A Creative Block

Write it down, sketch it.  Ideas come out of nowhere.  Keep that sketch book handy, write it down, draw it.  (Pull out some crayons and play!)


Tap in to your unconscious.  A semi-sleep state is a perfect start.  How many times has an idea come to you right before falling asleep? (Remembering what that idea is when you wake up is another challenge!)


Step away.  Forcing something is never good.  You can feel when something is forced or overworked.  Don't let it beat you down.  Let it go, walk away.  You don't want mediocre, step away.  It will come to you.


Liven up your work space!  Bring in some color!  Toys!  Quilts! Bright, bold fun!  Fill the void with inspiration.  Crank up the music! (Sterile is uninspiring!)


Unlikely inspiration.  How many times have you seen something unexpected and it got you thinking?  You'd be amazed at what you find, what you see.  Be open and expect the unexpected.  Find something you normally wouldn't look at ~ arts, cultures, geography, shapes, fashion.  (To name a few!)


There are many reasons a creative block happens.  Personal to professional problems. Let's face it, they are impactful.  Maybe you are overwhelmed with commitments.  Over extended and exhausted. Sometimes I get stopped in my tracks looking at other quilts that I love. Fleeting moments of being inadequate or incompetent are normal for me.  I have learned to work through them.  

And then...the ideas, creativity and inspiration comes back like a ton of bricks! (I'm not there yet, but will be soon!)


What better feeling than a creative high?!  Ideas bubbling in your head like a magic lava lamp!  You feel totally free, on top of the world and you can't seem to work fast enough. You lose track of time, forget to eat and stay in your pajamas all day long. 


The art of quilting has given me an artistic channel, an outlet.  I remind myself that you can't please everyone.  Art is subjective, people like what they like.  The main thing to remember is you.  Do you love what you do?  Are you happy with it?

How do you handle a creative block?  What do you do to overcome it?

Wednesday, February 18, 2015

Technicolor Madness?!

If I've said it once (every year), I've said it 100 times:  I want to push myself, learn more techniques, try new things this year.  Last year I did my first Block of the Month, so this year I wanted to do another one. When I saw Pile O' Fabric Skill Builder BOM ~ Technicolor Galaxy I thought perfect!  It's my BOM, new techniques, pushing myself all rolled in to one!  

Alyssa out did herself on this design!  It's packed full of techniques I have never tried. When My first thought 'perfect' quickly turned into 'Oh Crap' what have I gotten myself into?


I enrolled in the class and soon decided I should order the front fabric kit. I didn't want to become stressed out thinking about fabric choices.  

Then I realized I needed the templates.  And some of the skill builder supplies.  Another order was placed.  Oh Poop...I should have ordered the preprinted templates of freezer paper and stabilizer...too late for that as there were none available at that time.  Since I ordered packages of the papers to print myself, I did just that.  But I soon realized I didn't order enough stabilizer.  Another order.  Darn it...I ordered the wrong stuff...another order...

SO you can see how this went down!  So much for trying to keep the stress level at a minimum!

I pieced together the templates and was ready to roll!


After piecing the templates, I cut and placed them in their own little bags! I love to be organized and this made me happy!


Supplies!!  Isn't it fun to get new sewing toys?!  I have never used design sheets, Elmer's glue or fusible bias tape web.  This is going to be interesting! 


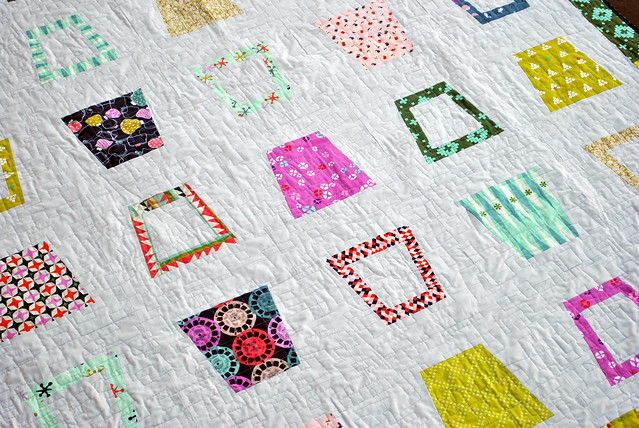
The front fabric kit.  A beautiful rainbow of colors and fabulous neutrals.  I have a lot to pick from for the color wheel and the rest of the front.  That layer cake of Kona solids made my heart beat a little faster...heaven!

Block #1 ~ The Color Wheel
Wanna talk about intimidation?  Oh, my!  I stared, hemmed and hawed, took a lot of deep breaths and decided to just suck it up and deal!  Pick some fabrics, starch, cut and do it. After all this is about skill building and if it looks like a pile of 'yuck'...so be it!


Good start.  I think.  Do not over think, do not over think, do not over think!


Much better.  It feels pretty good.


I decided on these prints for the next round, but I must have tried 50 different combinations before I settled on this.

Last round...


Okay, I'm satisfied for the most part.  Time to glue and iron the pieces to fabric!


I had so much fun with this part!  A great big puzzle!


And then I got to this part.  The fun abruptly stopped.  Unfortunately I didn't get pictures for the bias tape process.  I will say it was a royal pain in the ass.  Sorry, but it was.  Basically you use the design sheets and with an iron press the tape on the lines of the sheet.  It shapes the tape and in the end it becomes this big piece of circles.  After gently removing it from the design sheet you get to slide it onto the fabric.  

At that point, I was trying to be super, super careful to make sure all the seams were covered.  Move a little here, tug there, repositioning over and over.  And I thought I did just that.  I ironed the bias tape on and began to sew it down. Being careful.  Stay close to the edge.  There were a couple seams that didn't make it, so I ripped and fixed!

Free Motion quilting was next.  Knowing that this is also a Quilt-As-You-Go block, I had to think hard on thread colors and design.  It was going to be seen on the back after all.  


Going for it!  I said 'whatever' I'm using a rainbow of colored thread!  Why not?!  I decided on some basic designs for each round and went to town! 


And, I was okay with it.  My FMQ is getting better, but it isn't perfected.  I kind of dig the rainbow of thread colors.  So I reminded myself that this was a skill builder once again!

Block #1 is done for this month.  Whew ~ yeah, I'm relieved.  I have to think this is the most difficult block of the project.  

After I finished the quilting, I noticed that there were several spots where the fabric seams came up.  The glue didn't hold them down and the bias tape didn't cover/catch them.  And then after burying the threads, even more showed.  Ticked is an understatement. Again...skill builder reminder!

A couple things I would do differently.  Maybe use more glue on the edges of the fabric. Maybe use steam-a-seam.  Most importantly, I think I would iron the bias tape directly on to the fabric instead of shaping it ahead of time.  It would have been easier to make sure the edges of the fabric were covered.     

I am so happy to have started this Skill Builder BOM.  I think it will broaden my knowledge (maybe just enough to get me in trouble), take me out of my comfort zone (and we all need that once in a while) and I get to gain more experience!  YAY to that!

LINKING:

I am also having a giveaway right now!!  You can find it here:

Glass Half Full ~ Giveaway!!

Monday, February 16, 2015

Glass Half Full ~ Giveaway!!

I am so excited to be hosting this giveaway!  When I first joined Music City Modern Quilt Guild I was lucky enough to meet one of the sweetest and busiest ladies in town!  From quilting, crafting, writing, blogging and being a mommy ~ Lindsay is a huge inspiration to me and many, many others!   

Lindsay Conner
Lindsay Sews
I love this quilt pattern!  The name alone makes me smile!  It's a beautiful design full of fun and whimsy!!  

Who better to tell you about the quilt and giveaway?  That would be the super talented and gorgeous Lindsay herself!

Glass Half Full II Quilt

Late last year, I got the invitation to design a quilt with the new 2015 Cotton + Steel fabrics. The invite came from none other than . . . Craftsy! Of course, I said "Yes!" I received the fabric for this quilt around the holidays and stitched it up the first couple weeks of January. Now that the quilt kit is LIVE on Craftsy, I am happy to show it off!

Glass Half Full II Quilt Detail

I stitched up this quilt top on my Baby Lock Melody and and quilted it on my Tiara II (with my favorite free-motion rectangles pattern). It is completely luxurious to have so much room to move my quilt around without rolling it into a tightly wound burrito.

Photo via Craftsy


Glass Half Full II (a 65" x 89" twin-sized quilt), is available as a kit from Craftsy. I chose my favorite prints from the early 2015 Cotton + Steel collections. This was, of course, excruciating to narrow it down to just 15 prints. Because C+S fabrics play so well together, everything looked good. The kit features my faves from:
- Melody Miller's Playful collection

- Rashida Coleman-Hale's Mochi collection

- Alexia Abegg's Mesa collection

- Kim Kight's Cookie Book collection

- Sarah Watts's Tokyo Train Ride collection
Isn't is so cool how well these fabrics from 5 different collections work together? The binding is a navy blue text print. If you'd like, you can even pick up 5 1/2 yards of gorgeous, navy-blue C+S backing fabric to go with this quilt kit!


Treat yo' self to the Cotton + Steel Glass Half Full Quilt Kit here.


I resized and modified my crib-sized quilt of the same name and completely revamped the instructions to make it more straight-forward and to make the best use of the materials. It comes with full-size templates, assembly diagrams, and tutorial-style color photos to guide you step by step. My friend Mary designed the cover, templates and pattern, so it looks really fabulous.


See the Glass Half Full II pattern on Craftsy here.

Giveaway!

I'm giving away 3 PDF copies of the new Glass Half Full II quilt pattern. Good luck!


a Rafflecopter giveaway


Craft Buds and My Shop

Thank you Lindsay!  

And good luck everyone....remember this fabulous pattern is available via Craftsy!